按照惯例,先从 HelloWorld 开始:
1. 最普遍的 FastAPI 的写法
python
from fastapi import FastAPI
import uvicorn

app = FastAPI()

# 1. 使用app.method_name添加
@app.get('/welcome1')
def hello_world():
    return dict(
        msg='success',
        data='Hello World!'
    )

# 2. 同时添加多个
@app.api_route('/welcome2', methods=['GET', 'POST'], tags=['Hello World'])
def hello_world1():
    return dict(
        msg='success',
        data='Hello World!'
    )

if __name__ == '__main__':
uvicorn.run('app1:app', reload=True)其他运行方式
python
os.system('uvicorn app1:app --reload')
# or
os.system('fastapi dev app1.py')bash
uvicorn app1:app --reload
# or
fastapi dev app1.py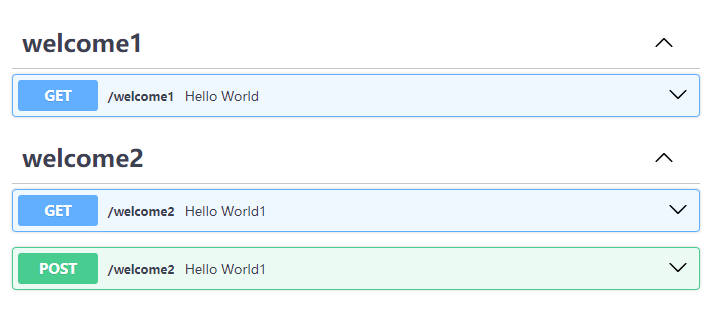
里面一些配置就不在后面写了,包括导包、运行服务器等;
2. 其他写法
python
app = FastAPI()

# 1. 路由分发,注册子路由器 APIRouter 类
router = APIRouter()
@router.get('/welcome')
def hello_world():
    return dict(
        msg='success',
        data='Hello World!'
    )

app.include_router(router=router, prefix='')


def hello_world1():
    return JSONResponse(
        content=dict(
            msg='success',
            data='Hello World!'
        )
    )

# 2. 不使用装饰器
app.post('/welcome1')(hello_world1)
app.api_route('/welcome2', methods=['PUT'])(hello_world1)

# 3. 直接添加路由
app.add_api_route(path='/welcome3', endpoint=hello_world1)
# websocket对应add_api_websocket_route

# 4. 直接添加路由
route = APIRoute(path='/welcome4', endpoint=hello_world1)
app.routes.append(route)

# 5. app挂载
app = FastAPI()
app1= =FastAPI()
@app1.get('/welcome5')
def hello_world2():
    return dict(
        msg='success',
        data='Hello World!'
    )
app.mount('/app1',app1)
# app1中所有请求都会被加上前缀/app1❗ 提示
- 最好不要在同一个
.api_route中映射多个方法
python
@app.api_route('/test1',methods=['GET','POST','PUT'])
def f():...

@router.api_route('/test2',methods=['GET','POST','PUT'])
def f():...- 首先这不太符合常理,同时也会收到以下警告

- 查看
openapi.json,可以发现,生成operationId格式大概是endpointName_path_method,且三者重复,都是第一个GET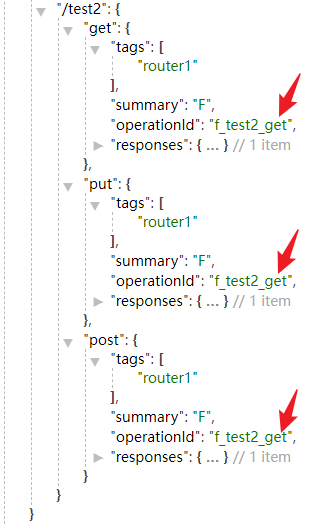
- 源码中默认生成operationId的方法,取请求方法列表中第一个方法

3. FastApiBoot 中的写法
FastApiBoot中的路由映射写法类似于SpringMVC,即通过Controller声明控制类(称之为CBV);之后在扫描项目时会使 控制器下的所有路由 从 失控 状态转为 受控-未激活 状态;- 在控制器中通过
RequestMapping、GetMapping等装饰器装饰具体路由处理方法;
只需以下两个步骤就可以完成本节的配置
- 控制器代码如下
python
# WelcomeController.py
from fastapi import Query
from fastapi_boot import Controller, RequestMapping, GetMapping, PutMapping

@Controller
@RequestMapping('/')
class WelcomeController:
    @RequestMapping('/hello1', tags=['Hello World'])
    def hello_world1():
        return 'Hello World!'

    @PutMapping('/hello2', tags=['Hello World Again!'])
    def hello_world2():
        return 'Hello World Again!'

    @PostMapping('/hello3', tags=['Hello FastApiBoot!'])
    def hello_fastapi_boot(self, p: str = Query()):
        return dict(
            query=p,
            msg='Hello FastApiBoot!'
)- 配置启动文件
☑️ 只需引入启动类,无需引入控制器;
✅ FastApiBoot 会 自动递归扫描 启动文件所在路径下所有的.py文件,并 自动加载 扫描到的控制器、自动受控,完成激活、注册;
❌ 注意项目下的包名不要和一些 py 包名重复(如test),可能会扫描失败;
python
# app1.py
from fastapi import FastAPI
import uvicorn

from fastapi_boot import FastApiBootApplication

app = FastAPI()
FastApiBootApplication.run_app(app)

def main():
    uvicorn.run('app1:app', reload=True)


if __name__ == '__main__':
main()项目(额,暂且先叫个项目吧)结构如下:

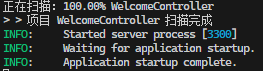
好了现在运行一下 app1.py,控制台输出如下:
FastAPI Swagger UI:
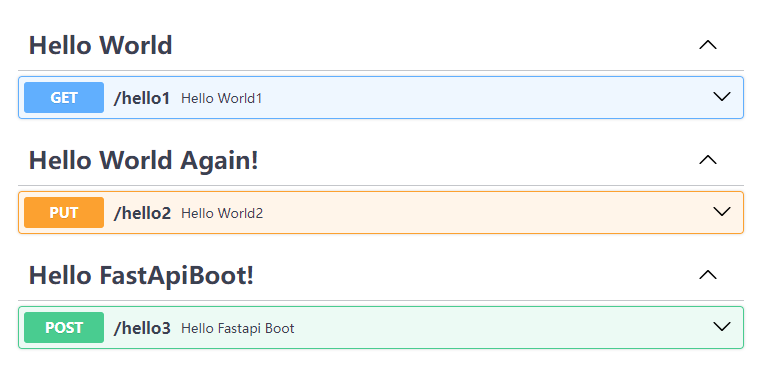
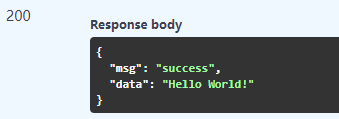
随便请求个接口:
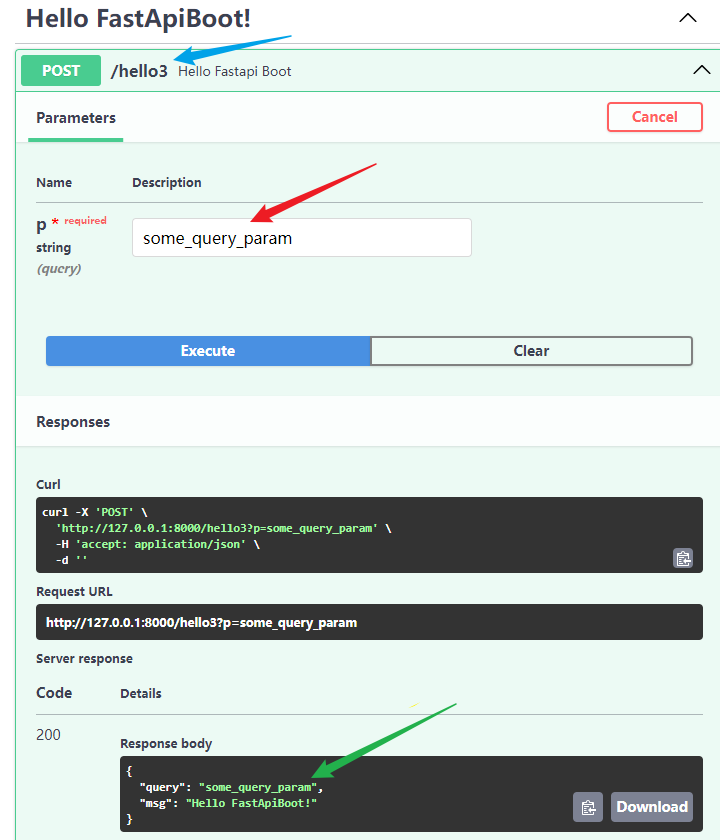
嗯,😃看起来效果还不错,应该大概也许可能说不定能够胜任简单的 API 开发了。具体高亮那些行有什么用法、底部做了什么处理,且听后面慢慢分解。